Musíte být přihlášen
-
WróćX
-
Komponenty
-
-
Category
-
Polovodiče
- LED diody
- Tyristory
- Elektroizolační moduly
- Přemosťovací usměrňovače
-
Tranzistory
- Tranzistory | GeneSiC
- SiC MOSFET moduly | Mitsubishi
- SiC MOSFET moduly | STARPOWER
- Moduly ABB SiC MOSFET
- Moduly IGBT | MITSUBISHI
- Tranzistorové moduly | MITSUBISHI
- Moduly MOSFET | MITSUBISHI
- Tranzistorové moduly | ABB
- Moduly IGBT | POWEREX
- Moduly IGBT | INFINEON (EUPEC)
- Polovodičové prvky z karbidu křemíku (SiC)
- Przejdź do podkategorii
- Ovladače brány
- Bloky napájení
- Przejdź do podkategorii
- Měniče proudu a napětí LEM
-
Pasivní součásti (kondenzátory, rezistory, pojistky, filtry)
- Rezistory
-
Pojistky
- Miniaturní pojistky pro elektronické obvody řady ABC a AGC
- Trubkové rychle působící pojistky
- Pojistkové vložky s časovým zpožděním s charakteristikami GL / GG a AM
- Ultrarychlé pojistkové články
- Rychle působící pojistky (britský a americký standard)
- Rychle působící pojistky (evropský standard)
- Pojistky pojezdu
- Pojistkové vložky vysokého napětí
- Przejdź do podkategorii
-
Kondenzátory
- Motorové kondenzátory
- Elektrolytické kondenzátory
- Filmové kondenzátory
- Výkonové kondenzátory
- Kondenzátory pro stejnosměrné obvody
- Kondenzátory korekce účiníku
- Vysokonapěťové kondenzátory
- Indukční topné kondenzátory
- Kondenzátory pulsu a energie
- DC LINK kondenzátory
- Kondenzátory pro AC / DC obvody
- Przejdź do podkategorii
- EMI filtry
- Superkondenzátory
- Přepěťová ochrana
- Filtry pro odhalování emisí TEMPEST
- Przejdź do podkategorii
-
Relé a stykače
- Teorie relé a stykačů
- 3fázová střídavá polovodičová relé
- 3fázová střídavá polovodičová relé
- Regulátory, ovládací prvky a příslušenství
- Měkké spouštění a reverzační stykače
- Elektromechanická relé
- Stykače
- Otočné spínače
-
Jednofázová střídavá polovodičová relé
- Jednofázová střídavá polovodičová relé, 1 řada | D2425 | D2450
- Jednofázová střídavá polovodičová relé řady CWA a CWD
- Jednofázová střídavá polovodičová relé řady CMRA a CMRD
- Jednofázová střídavá polovodičová relé řady PS
- Dvojitá a čtyřnásobná střídavá polovodičová relé řady D24 D, TD24 Q, H12D48 D.
- Jednofázová polovodičová relé řady GN
- Jednofázová střídavá polovodičová relé řady CKR
- Jednofázová AC relé na lištu DIN řady ERDA A ERAA
- Jednofázová AC relé pro proud 150 A.
- Dvojitá polovodičová relé integrovaná s chladičem pro lištu DIN
- Przejdź do podkategorii
- Jednofázová AC polovodičová relé pro PCB
- Relé rozhraní
- Przejdź do podkategorii
- Jádra a další indukční součásti
- Radiátory, varistory, tepelné ochrany
- Fanoušci
- Klimatizace, příslušenství pro elektrické skříně, chladiče
-
Baterie, nabíječky, vyrovnávací zdroje a střídače
- Baterie, nabíječky - teoretický popis
- Lithium-iontové baterie. Vlastní baterie. Systém správy baterií (BMS)
- Baterie
- Nabíječky baterií a příslušenství
- Záložní zdroj UPS a vyrovnávací napájecí zdroje
- Převaděče a příslušenství pro fotovoltaiku
- Úschovna energie
- Palivové články
- Lithium-iontové baterie
- Przejdź do podkategorii
- Automatika
-
Kabely, dráty, vodiče, flexibilní připojení
- dráty
- lanka
- Kabely pro speciální aplikace
- košile
-
prýmky
- prýmky byt
- prýmky kolo
- Velmi flexibilní opletení - plochý
- Velmi flexibilní opletení - Round
- Měď opletené válcové
- Mědí štít a válcové
- Flexibilní zemnící pásky
- Opletení válcovité pozinkované a nerezové oceli
- PVC izolované měděné pletivo - teplota 85 ° C
- Ploché pletené hliníkové
- Connection Kit - prýmky a trubky
- Przejdź do podkategorii
- Příslušenství pro trakční
- kabelové botky
- Ohebné izolované přípojnice
- Vícevrstvá ohebná lišta
- Systémy vedení kabelů
- Przejdź do podkategorii
- Zobacz wszystkie kategorie
-
Polovodiče
-
-
- Suppliers
-
Applications
- AC a DC pohony (střídače)
- Automatizace HVAC
- CNC obráběcí stroje
- Energy bank
- Indukční ohřev
- Komponenty pro prostředí s nebezpečím výbuchu (EX)
- Měření a regulace teploty
- Měření a regulace teploty
- Motory a transformátory
- Napájecí zdroje (UPS) a usměrňovací systémy
- Průmyslová automatizace
- Průmyslová automatizace
- Průmyslová ochranná zařízení
- Stroje na sušení a zpracování dřeva
- Stroje na tvarování plastů za tepla
- Svařovací stroje a svářecí stroje
- Těžba, hutnictví a slévárenství
- Tisk
- Tramvajová a železniční trakce
- Zařízení pro distribuční, řídicí a telekomunikační skříně
-
Instalace
-
-
Induktory
-
-
Indukční zařízení
-
-
Servis
-
- Kontakt
- Zobacz wszystkie kategorie
Measurement and documentation of corrosion protection coating – Easier than ever before

Measurement and documentation of corrosion protection coating – Easier than ever before
How modern coating thickness gauges support inspectors in evaluating and documenting coating systems in corrosion protection
Steel components are used in a wide range of different applications, and are subject to heavy stress due to environmental influences and the effects of climate change. Specialised coating systems provide essential corrosion protection, but must be inspected regularly. Precise and robust measuring gauges and clear documentation are essential when conducting these inspections.
No corrosion protection coating can permanently prevent the gradual destruction of metal materials caused by electrochemical reactions. Globally, pitting corrosion consumes around five tons of steel every second. Therefore, the purpose of any efficient corrosion protection method must be to slow down corrosion, in order to prevent serious damage to the component throughout its service life. In addition to compromising safety, this damage can also have significant economic consequences. Corrosion damage costs around 90 billion euros per year in Germany alone, a figure that is increasing over time. Experts believe that 24 to 31 billion dollars will need to be invested in corrosion protection worldwide by 2023, with the largest markets being China and other Asian Pacific countries, followed by Europe. Consistent corrosion protection reduces expenditures over the long term, relieving national, state and municipal budgets.
In general, it is important to check every component to ensure that the corrosion protection agreed with the client has been fulfilled, or is still intact. There are few other applications subject to such extensive specifications, standards and guidelines. At the start of the collaboration, the client and contractor agree on a binding process to carry out and monitor coating work. Concrete specifications are defined for qualifying contractors, applying the coating, monitoring and testing, and creating control surfaces. For example, a coating company may be required to consult with a corrosion protection expert like a Frosio Inspector, who can monitor for compliance with the required blasting and coating quality. In addition, the parties stipulate which ISO standard should be used to govern the process. If the coating thickness gauge uses default standard parameters – ISO 19840, SSPC PA2 (Level 1-5), IMO SSPC – then this greatly accelerates the inspection process, since users only need to enter order-specific values to measure the dry coating thickness.
Challenging environmental influences
Only coating systems ensure that corrosion protection will remain effective throughout a component's entire service life and that, if damage does occur, the corrosion protection can be repaired and restored. A coating system composed of multiple individual layers is generally used in areas exposed to extreme moisture or highly abrasive atmospheres, containers for chemical products, salty, sandy and tropical environments, and in all other aggressive atmospheres, coatings for steel structures such as bridges or supporting structures, industrial systems and wind turbines, train tracks, pipelines, vehicles, ships and machines. However, this protection must always be adapted to the changing external conditions. Climate change, for instance, is causing temperature fluctuations, increasing UV radiation, and changing, extreme weather conditions involving heavy rains, hail and storms. Due to increasing air pollution, acid rain is also a serious problem that negatively impacts not only nature, but buildings and the coatings of metal components as well, causing acid corrosion. In order to ensure long-term corrosion protection, therefore, it is important to always define the appropriate coating system based on where the component will be used and the prevailing ambient conditions. This definition is based on ISO standard DIN EN ISO 12944, parts 1-9. Precision and durability are key in production: Each individual layer of the coating system must be inspected carefully using extensive measurements, in order to ensure the desired corrosion protection is maintained over the long term. This kind of comprehensive assessment is not possible later on when the component is in use; however, it is important to regularly check coatings using coating thickness gauges, in order to identify weak areas early on and take targeted counter-measures to address them.
Choosing the right device for efficient work
A systematic approach to measurements and seamless documentation are important when applying and monitoring corrosion protection in heavy-duty applications. Each individual dry layer must be inspected in a structured manner, based on a defined minimum number of measurement points and documented. A clearly laid out inspection report is helpful for making results accessible to all stakeholders. The individual layers of the coating system are measured and documented repeatedly during the production process for components exposed to corrosion. After production as well, coating thickness is measured multiple times – during production acceptance procedures, before and after assembly, and during the overall final inspection of the structure. This is an extremely complex process that poses unique challenges for those involved and for measurement technology, that must be carried out as efficiently as possible and with absolute precision, and that must be able to be carried out in any working environment.
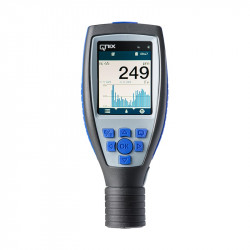
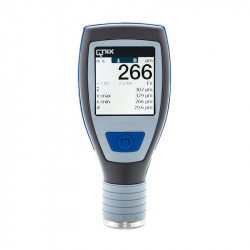
When it comes to corrosion protection, in particular, users must be able to rely on coating thickness gauges that are always ready for use and that can stand up to the tough conditions of industrial manufacturing. If devices are not robust, they will not be able to withstand challenging environments for long without frequent failures and repairs. Blasting components during coating, for instance, produces large amounts of dust that can easily clog measurement devices. It is essential, therefore, to only use extremely resistant coating thickness gauges for corrosion protection applications. In QNix® measurement devices, for instance, a specially developed dust protection membrane made of silicone that has been tested in space protects the measurement technology in the probe. Both handheld devices and exchangeable digital probes, as well as integrated probe variants are dust-tight and protected against water spray in accordance with protection class IP65. All parts are also resistant to chemicals, and can easily be cleaned using acetone, cellulose thinner and ethanol, so as not to interfere with an efficient work process.
To guarantee precise results over thousands of measurement points, the contact surfaces used to reference the measurement device when taking measurements on metal surfaces should be made of a very hard, abrasion-resistant material. Metal contact surfaces will wear over time due to constant contact with other metal surfaces, increasingly delivering incorrect measuring results. A highly polished ruby makes a very good reference surface, since it is one of the world's hardest materials and does not wear, even after countless uses. In addition, measurement devices may be exposed to shocks and impacts in hectic work environments, or may not always be stored carefully. This is not necessary with the new generation of devices. Multi-layer, fibreglass reinforced plastic housings that protect against impact and dissipate forces are now standard on well-equipped models. Displays also need to be resistant to scratches and impacts, in order to avoid becoming cloudy with use and cleaning, guaranteeing measured values remain clear and legible even in poor lighting conditions.
Quick check, or comprehensive documentation?
To ensure economic efficiency, it is important to always choose a measurement device tailored to your specific requirements. If the device has too many unnecessary features, it can be challenging to use, rather than intuitive. A device with a memory for measured values, statistical functions, and analytic software is needed to document and assess component coating thickness while conforming to standard specifications and limit values. In contrast, if users only need to check whether a coating has been applied thick enough during the coating process, then a simple device that delivers reliable measurement results easily and quickly will be enough. Ideally, the device should measure coating thickness at the push of a button.
In quality management and documentation, users need to complete a large number of measurements of different components over one or multiple days, so that they can precisely classify and evaluate these later on. A measurement device with memory function that can finely assess different sections of the component is the best choice. Individual areas of a component (as a job) must be measured across multiple components. Assessment and documentation are then completed on a computer, and also need to be as simple as possible. Ideally, software should be used to configure a workflow and should allow the user to generate, save or print out the component test report with just a few clicks. An analysis that takes several hours can be frustrating when time is short.
Therefore, each inspector should select the coating thickness gauge that is right for their work, with sufficient complexity: An easy to operate measurement device for quick intermediate checks, or a highly-complex device for full, standardised testing reports. In both cases, however, basic characteristics like measurement precision, simple operation and robustness no matter the application are essential in the long-term.
Information on the new QNix® coating thickness gauges
Product name: QNix 5500 and QNix 9500
Advantages:
- Fibreglass reinforced, five-piece housing with IP65 dust and water spray protection
- LCD pane made of scratch-resistant, chemical-resistant* glass (level H6)
- Stainless steel probe with dust protection membrane (IP65)
- Temperature compensation directly in the sensor
- Dual probes for Fe and NFe coatings
- Simple one-button operation (QNix 5500)
- Direct feedback with limit values shown on the handheld device display and RGB LED on the probe (QNix 9500)
- Probe adapter cable made of PUR suitable for drag chain use (QNix 9500)
- Pre-configured standards (ISO 19840, SSPC PA2, IMO SSPC) (QNix 9500)
- Create custom report templates via drag and drop (QNix 9500)
- Powerful integrated statistics functions allow you to analyse your measurements with just three clicks (QNix 9500)
Související produkty
Související příspěvky
 Now available – DC/DC converters from PREMIUM
 New release in DACPOL lighting for lathes – Kira covers

Zanechat komentář