shopping_cart
Колица
0,00 PLN
0
цлипбоард
Морате бити пријављени да
-
-
-
Category
-
Полупроводници
- диоде
- Тиристори
-
Електро изоловани модули
- Електро изоловани модули | ВИСХАИ (ИР)
- Електро изоловани модули | ИНФИНЕОН (ЕУПЕЦ)
- Електро изоловани модули | Семикрон
- Електро изоловани модули | ПОВЕРЕКС
- Електро изоловани модули | ИКСИС
- Електро изоловани модули | ПОСЕИЦО
- Електро изоловани модули | АББ
- Електро изоловани модули | ТЕЦХСЕМ
- Go to the subcategory
- Мостовни исправљачи
-
Транзистори
- Транзистори | GeneSiC
- SiC MOSFET модули | Mitsubishi
- SiC MOSFET модули | STARPOWER
- АББ СиЦ МОСФЕТ модули
- IGBT модули | MITSUBISHI
- Транзисторски модули | MITSUBISHI
- MOSFET модули | MITSUBISHI
- Транзисторски модули | ABB
- ИГБТ модули | POWEREX
- ИГБТ модули | ИНФИНЕОН (ЕУПЕЦ)
- Silicijum-karbidni poluprovodnički elementi
- Go to the subcategory
- Гате Дриверс
- Блокови напајања
- Go to the subcategory
- Električni pretvarači
-
Пасивне компоненте (кондензатори, отпорници, осигурачи, филтери)
- Otpornici
-
Osigurači
- Minijaturni osigurači za elektronske sisteme serije ABC i AGC
- Cilindrični brzi osigurači
- Osigurači sa odloženim delovanjem GL/GG i AM karakteristika
- Ultra-brzi osigurači
- Brzi osigurači sa britanskim i američkim standardom
- Brzi osigurači sa evropskim standardom
- Vučni osigurači
- Visokonaponski osigurači
- Go to the subcategory
-
Kondenzatori
- Motorni kondenzatori
- Elektrolitski kondenzatori
- Kondenzatori - snubberi
- Energetski kondenzatori
- Kondenzatori za DC kola
- kondenzatori za kompenzaciju snage
- Visokonaponski kondenzatori
- Kondenzatori za indukciono grejanje
- Impulsni kondenzatori
- ДЦ ЛИНК кондензатори
- Кондензатори за АЦ/ДЦ кола
- Go to the subcategory
- EMI filtri
- Superkondenzatori
- Заштита од пренапона
- Go to the subcategory
-
Releji i kontaktori
- Теорија релеја и склопника
- Trofazni poluprovodnički releji
- Трофазни полупроводнички релеји наизменичне струје
- Регулатори, команде и додаци
- Sistemi za meki sart i reverziblni kontaktori
- Elektromehanički releji
- Kontaktori
- Rotacioni prekidači
-
Једнофазни полупроводнички релеји наизменичне струје
- Једнофазни релеји наизменичне струје, 1 серија | Д2425 | Д2450
- Jednofazni poluvodički izmjenični releji CWA i CWD serije
- Jednofazni poluvodički izmjenični releji CMRA i CMRD serije
- Jednofazni poluvodički izmjenični releji - serija PS
- Двоструки и четвороструки полупроводнички релеји наизменичне струје, серије Д24 Д, ТД24 К, Х12Д48 Д.
- Jednofazni poluvodički releji - gn serije
- Jednofazni kružni releji Ckr serije
- Jednofazni AC poluvodički releji za DIN sabirnice - ERDA I ERAA serija
- 150A AC jednofazni releji
- Čvrsti releji s ugrađenim hladnjakom na šini - ENDA, ERDA1 / ERAA1 series
- Go to the subcategory
- Monofazni poluprovodnički releji za štampane ploče
- Интерфејс релеји
- Go to the subcategory
- Indukcione komponenete
- Radijatori, Varistori, Termička zaštita
- Ventilatori
- Klimatizacija, Pribor za industrijska kućišta, Kuleri
-
Батерије, пуњачи, бафер напајања и претварачи
- Батерије, пуњачи - теоријски опис
- Litijum-jonske baterije. Nestandardne baterije. Sistem za upravljanje baterijom (BMS)
- Baterije
- Punjači i dodaci za baterije
- UPS i puferski izvori napajanja
- Pretvarači i dodaci- fotonaponski
- Складиште енергије
- Гориве ћелије
- Литијум-јонске батерије
- Go to the subcategory
-
Automatika
- Futaba Drone Parts
- Крајњи прекидачи, микро прекидачи
- Сензори, претварачи
- Пирометрија
- Бројачи, тајмери, панел мерачи
- Индустријски заштитни уређаји
- Светлосна и звучна сигнализација
- Термовизијска камера
- ЛЕД дисплеји
- Тастери и прекидачи
-
Снимачи
- Снимач АЛ3000
- КР2000 снимач
- Снимач КР5000
- ХН-ЦХ мерач са функцијом регистрације влажности и температуре
- Потрошни материјал за снимаче
- 71ВР1 снимач
- Снимач КР 3000
- ПЦ снимачи серије Р1М
- ПЦ снимачи серије Р2М
- ПЦ снимач, 12 изолованих улаза - РЗМС-У9
- ПЦ снимач, УСБ, 12 изолованих улаза - РЗУС
- Go to the subcategory
- Go to the subcategory
-
Kablovi, Licnaste žice, Kablovski kanali, Fleksibilne veze
- жице
- лицнастим жице
- Каблови за специјалне намене
- схиртс
-
плетенице
- браидс флат
- плетенице коло
- Врло флексибилан плетеница - стан
- Врло флексибилан плетеница - коло
- Бакар плетена цилиндрични
- Бакра плетеница штит и цилиндрични
- Флексибилни уземљење траке
- Плетенице ЦИЛИНДРИЦАЛ поцинковани и нерђајућег челика
- ПВЦ изолацијом бакарне плетенице - Температура 85 ° Ц
- Стан плетени алуминијум
- Цоннецтион Кит - плетенице и цеви
- Go to the subcategory
- Прибор за вучу
- папучица
- Флексибилни исолатед сабирнице
- Вишеслојна флексибилан шина
- системи за управљање кабл
- Водове, цеви
- Go to the subcategory
- View all categories
-
Полупроводници
-
-

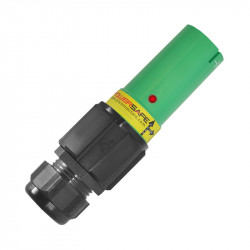
5 Best Methods for Installing POWERSAFE (POWERLOCK) Connectors
 Connectors")
5 Best Methods for Mounting POWERLOCK Connectors Step by Step
Looking for reliable and effective methods for mounting power connectors? Phase 3 Connectors has provided a detailed guide that describes step-by-step the three most popular methods: screwing, mounting on threaded sleeve, and clamping. In this article, we will focus on the first two methods, discussing their key steps and recommendations.
Screwing Method for Mounting POWERLOCK Connectors
The screwing method is one of the most commonly used methods for mounting power connectors. Here are the steps to correctly terminate a cable using this method:
Step 1: Preparation
- Unpack the packaging and remove the cable gland and contact.
- Check the cable diameter. The standard black gland M40A is designed for cables with a diameter of 19-28 mm. If the cable has a diameter between 15 and 18 mm, the reducer PP00131 should be applied to the M40A gland.
Step 2: Cable Preparation
- Slide the cable gland along the cable sheath.
- Apply the appropriate end collar or combination of collars to the conductors. Ensure that all conductor cores are inside the end collar.
Step 3: Cable Termination
- Carefully remove the cable insulation by 33 mm. Try not to damage any of the conductor cores.
Step 4: Screwing
- Insert the cable and reducers into the back of the contact, ensuring they are fully inserted inside the contact. Use a 5 mm wrench to tighten the screws according to the table.
Mounting on Threaded Sleeve Method for POWERLOCK Connectors
Another popular method for mounting power connectors is mounting on a threaded sleeve. Here's how to do it step by step:
Step 1: Inserting the Contact
- Insert the contact into the back of the insulator and align the hole in the contact to be in line with the holes in the insulator.
Step 2: Mounting the Threaded Sleeve
- When the panel connector is mounted in the device, remove the nut and washer from the threaded part.
- Place the selected terminal or accessory on the threaded area.
- Reapply the washer and screw onto the threaded area, tightening to a maximum of 12-14 Nm.
With these detailed instructions, mounting power connectors becomes simple and effective. Let's now move on to the next part, where we will discuss step by step the clamp methods and the termination of connector mounting.
Crimping Pins Method
The last method we'll discuss is the crimping method, which requires special tools to perform the assembly correctly. Here's how to proceed:
Step 1: Tool Preparation
- Ensure you have the appropriate crimping tools, including the correct jaw set.
Step 2: Selecting Crimping Set
- Choose the appropriate crimping set based on the cable size. For example, if you're using a cable with a cross-section of 240 mm², use the ME48 set.
Step 3: Cable Preparation
- Remove the cable insulation, leaving 43 mm of exposed wires.
Step 4: Wire Insertion
- Insert the wire into the back of the contact, ensuring all wire strands are inside the contact.
Step 5: Crimping
- Carefully place the contact and wire into the crimping tool and close the tool. When the tool achieves the proper compression, you will feel and hear a click. Then, the tool can be opened to release the crimped contact.
When selecting the appropriate mounting method, always follow the manufacturer's recommendations and strictly adhere to the steps. Let's now proceed with the termination of connector mounting and discuss safety and maintenance procedures.
Clamping Method
The clamping method involves mechanically clamping wires using special clamps, ensuring a solid electrical connection. Here are the steps for mounting a connector using this method:
Step 1: Wire Preparation
- Prepare the wire appropriately by removing insulation to a specified length and bending a small portion of the wire end at a 90-degree angle.
Step 2: Inserting Wire into Connector
- Insert the appropriate wire end into the clamping connector, ensuring all wire strands are properly positioned.
- Use a special crimping tool to securely clamp the connector onto the wire. Ensure that the crimping is sufficiently strong to provide a reliable connection.
Soldering POWERLOCK Connectors Method
The soldering method involves connecting wires by melting solder and joining it with connector elements. Here are the steps for mounting a connector using this method:
Step 1: Wire Preparation
- Remove the wire insulation to a specified length and clean the exposed wire section using a cleaning agent or sandpaper.
- Apply solder to the cleaned wire section and the appropriate connector part.
- Insert the cleaned wire into the connector and solder it using a soldering iron, ensuring a solid connection.
Completing Connector Mounting and Safety Procedures
Termination of power connectors is a key element in ensuring a reliable electrical connection. After completing the mounting of connectors, it's important to perform safety and maintenance procedures to ensure long-term performance and safety of the connection.
Safety Procedures:
- 1. Regular Insulator Checks: Periodically inspect the outer surface of insulators for cracks or damage. If any signs of damage are detected, the insulator should be replaced.
- 2. Check Cable Gasket Tightness: During use, cable gaskets may loosen, leading to water ingress. Regularly checking the tightness of gaskets is therefore essential.
- 3. O-ring Seal Inspection: If you suspect O-ring seal degradation, they should be replaced. Seals should be in good condition and properly positioned inside the connectors.
- 4. Regularly check the condition of the front sealing ring. Additionally, applying a thin layer of silicone grease to the sealing ring surface will allow for easy mating and protect the ring from degradation.
Performing these procedures after mounting power connectors is crucial to ensuring long-term performance and safety of the connection. They can help avoid potential failures and hazards to the electrical system.
If needed, service replacement parts are readily available from the manufacturer. It's also important to remember that any work related to the installation, inspection, and maintenance of power connectors should be carried out only by qualified electricians, following local and national electrical regulations.
Summary
Mounting POWERLOCK connectors requires precision and the right tools, but also strict adherence to the manufacturer's recommendations. With detailed instructions, you can effectively assemble cables, ensuring reliability and safety of the connection.
Related product
Related posts
Now available – DC/DC converters from PREMIUM
We introduced a novelty to our permanent offer in DACPOL in the category of power supplies and converters and today...
Read more
New release in DACPOL lighting for lathes – Kira covers
We introduce a new product into the DACPOL category of industrial lighting and today we offer KIRA covers for...
Read more
Leave a comment